Calder and Hebble - The Halifax Arm - Part 2
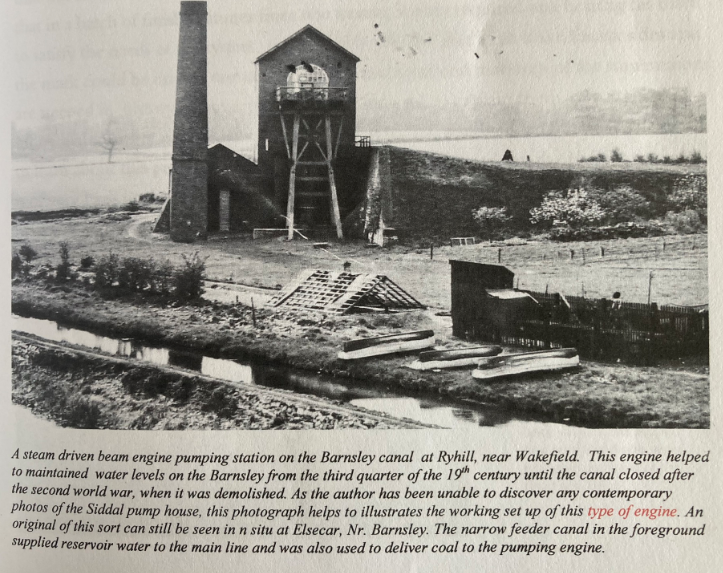
By way of comparison, the Barnsley canal opened in 1802 highlights many of the financial and physical difficulties faced by builders of the Halifax branch. Both were made for broad beam barges and faced very similar problems. Each canal required an aqueduct and numerous bridges to reach their destinations. Both of them encountered steep inclines and rock outcrops which entailed a lot of blasting and lock construction work and they both had problems with water supplies which forced them to back pump up flights of locks. However, after taking into account that the Barnsley was 16 miles long, with 20 locks, 20 bridges and a large five arch aqueduct, with building costs of only a little over £30,000 more than Halifax, makes the latter look a very expensive enterprise indeed.
After allowing for the 26 years difference of inflation in labour and materials, which were reasonably stable during this period, the Barnsley job was completed at an all in price of £3.37 per yard, and the Halifax job was £27.27 per yard. This staggering total for the Halifax, which equates using an average earnings converter to over £50 million at todays prices, must have been an enormous act of faith, or desperation, on the part of the investors.
The reasons for the excessive amount of time and money spent on constructing the Halifax canal are not immediately so apparent. There are the obvious features of five bridgs, fourteen locks and an aqueduct in the 1 and a quarter miles of length, which is a great deal of building work, not to mention the ancillary features such as the pump house, wharfs, retention and boundary walls, plus the actual digging of the cut. There are only a few stretches of canal in the country that can boast so many structures in such a short distance. However, this does not explain the whole picture, and it becomes obvious after a close inspection, that more was spent on the construction of this canal than was necessary for functionality.
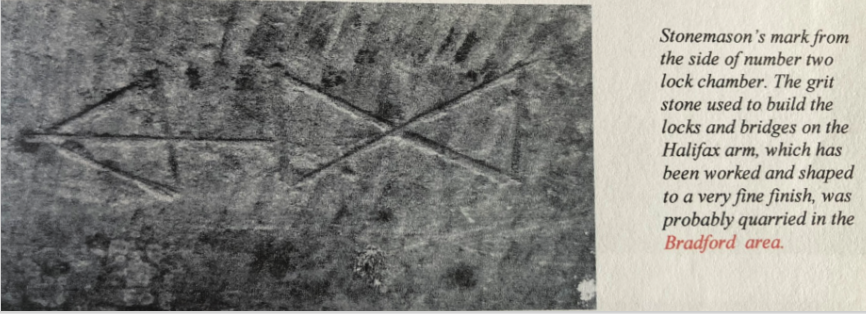
On the Salterhebble Road bridge and visible remains of locks 1 & 2, there are scores of stonemasonry marks to be seen, so far, no less than thirty individual symbols have been identified on these three structures alone. There are undoubtedly more to be found? On projects where stonemasons were employed, as opposed to bricklayers or jobbing builders, these personal marks identify the individual mason who had produced that particular piece of work. On large works, where many masons were employed, this method could be used to pay them for their output and as a form of quality control. For example, pieces arriving on site that were judged to be incorrectly or poorly cut, could then be traced back to the individual mason. It may be that in a batch of finished stones from one mason, it only required one bearing his mark to satisfy the needs of the system, or it could be the fact that a cut stone has six sides and the mark could be on any one of them?
The traditions and markings of the stonemasons are steeped in history with very little written material to explain them. If a register of individual masonry marks was ever compiled, it has not survived, and there is still much to learn about this practice! What can be said about their work on the Halifax Arm, is that it is of very high quality in both material and execution. It therefore follows that the investors and promoters of the canal had opted for whatever reasons, for the best available, despite the additional expenditures that were also required.
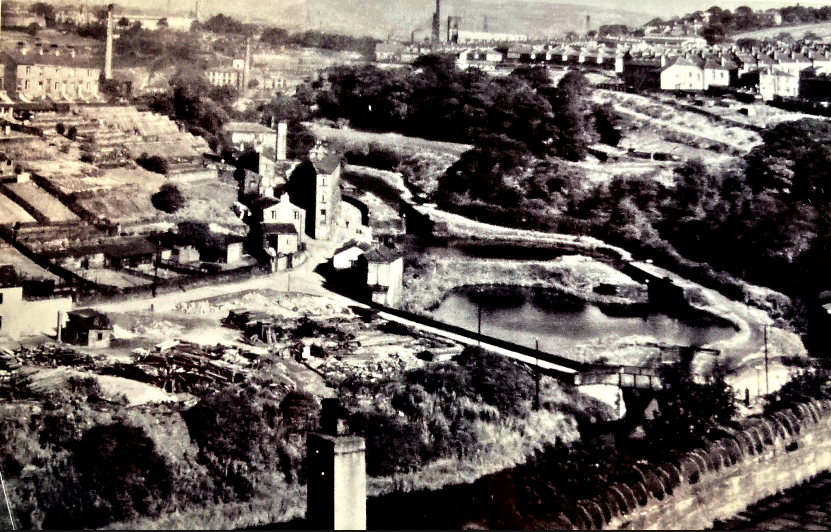
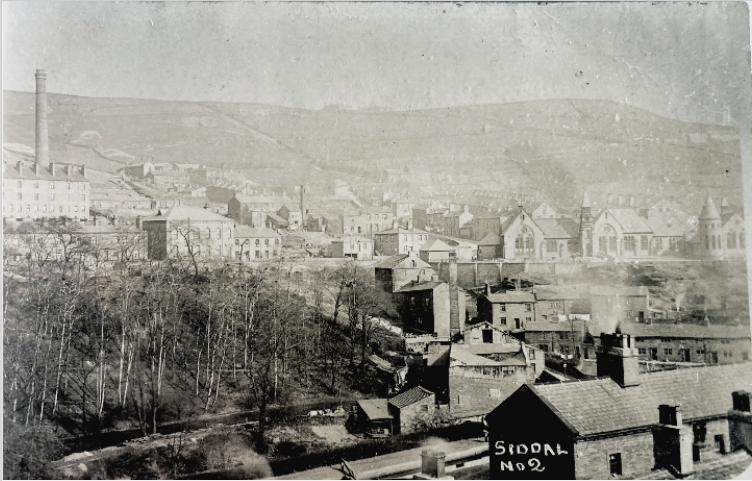
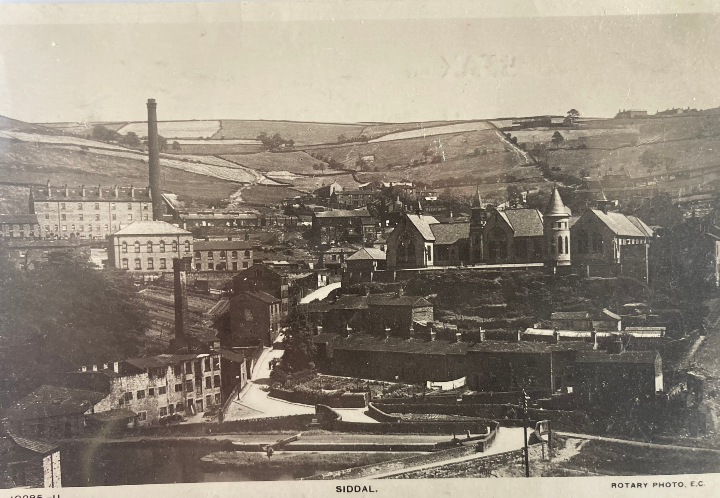
Siddal Bottoms in 1913 looking across number 3 lock. The large building at the top right of the picture is Siddal School. The disused and roofless Bottoms Mill is on the lower left hand side of the view.
The largest single outlay for the canal promoters was undoubtedly the water supply solution. The majority of the cost having been forced on them by the refusal to allow the extraction of water from the Hebble above Halifax. The recognised practice of canal builders was to establish a supply above the highest level of the canal or pound as it is called, and keep this section topped up as boat traffic released water down the locks to lower pounds.
This was achieved by constructing reservoirs on high ground that could store stream water during winter, or by damming rivers and diverting some of the flow into supply culverts. The design for the Halifax arm was the weir and culvert method. The difference was, because of the mill owners' opposition, it was sited at the bottom of the canal and not above the summit terminus where it should have been. Because of the artificial nature of canals, nearly all the supply solutions were affected by drought conditions and the use of pumping engines to lift used water back up lock flights became more commonplace in susceptible areas. For the Halifax arm, it was the only method available to keep the system of water and it was recorded that during busy periods it was necessary to run the pump night and day. Apparently, much to the annoyance of the residents of Siddal.
In 1834, the Calder and Hebble company commissioned the civil engineer, Henry Palmer, to write a report on the water supply problems of the Halifax Arm, which, by the 1830's was causing delays to boat traffic into town. He reported that in 1833, 1700 passages had been made along the canal which had required the pumping 250 cubic yards of water for each boat to maintain the levels, a total of over 71 million gallons for the year. Amazingly, the Siddal engine continued working, reportedly without a major breakdown until the canal closed in 1942.
The huge cost of tunnelling 2200 yards of lined water conduit under the Hebble valley and the continual expense of running the pumping engine, made the Halifax arm a costly canal to operate. Consequently, the toll charges levied for passage were double those of the main line as the Calder & Hebble company strove to recover some of the costs. Within a relatively short period after its' opening, the Halifax arm had serious competition for trade when the rail network expanded into the second half of the 1800's. This was compounded towards the end of the century as the road transport network began to improve, firstly with steam traction engines, followed very quickly into the 1900's with petrol driven wagons.
It is now widely accepted that the large amount of surplus wagons from WW1 that were vying for trade at this time, were responsible for putting the canal network into terminal decline. By the start of the WW2, very few people had any interest in a little used, ill repaired and expensive to run canal. The dark and desperate days of the 1940's finally put an end to this masterly piece of civil engineering, and infilling commenced almost immediately.
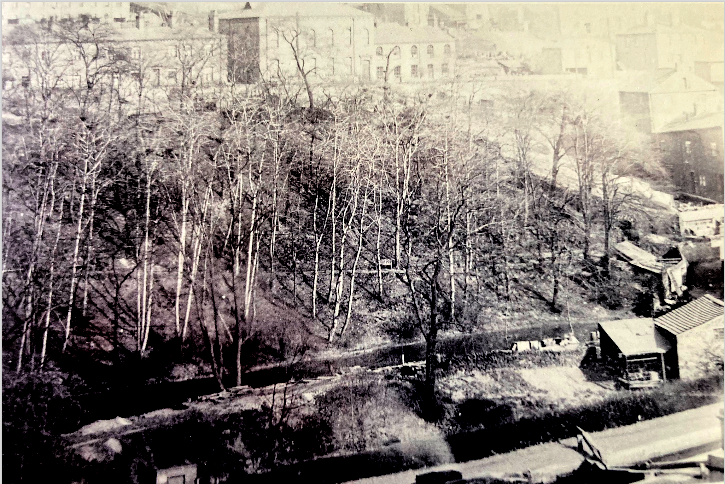
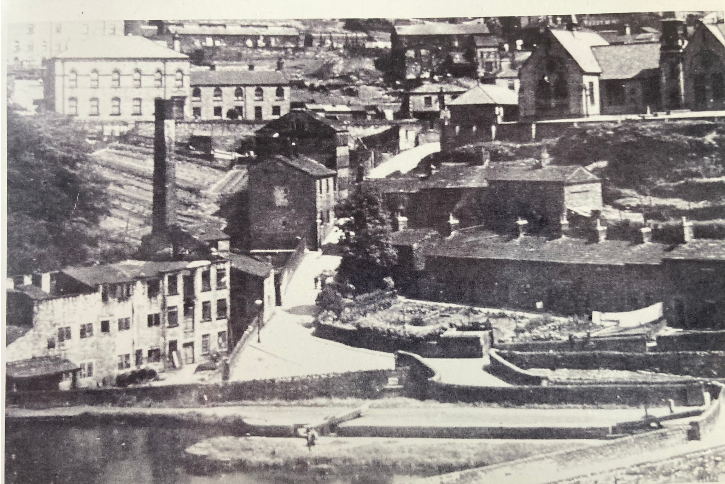
What looks to be a water course of the wood in this early 19th century picture, is in fact a mill pond that served Bottoms Mill in its' working days. Number 4 lock is just visible in the right hand corner of the view with the Hebble Brook running along side it.
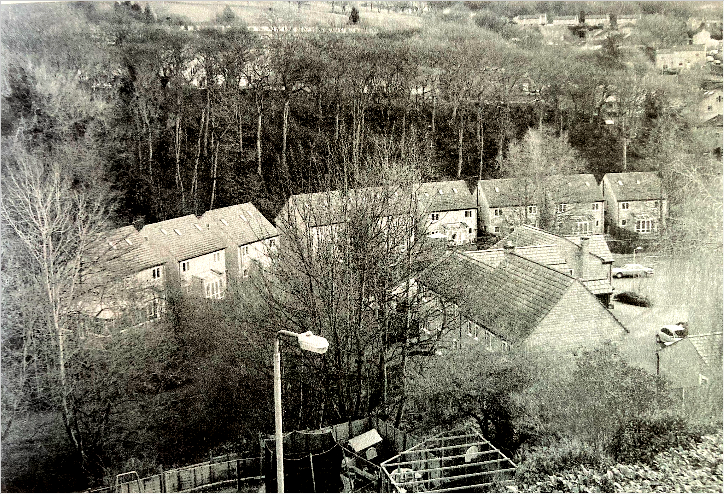
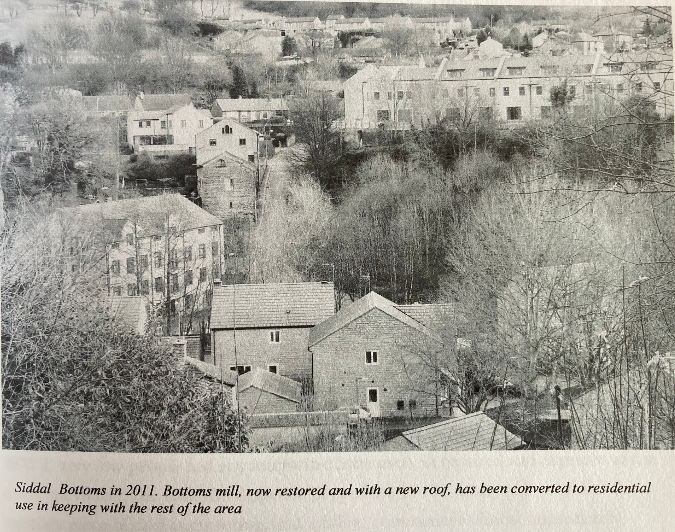
The mill pond and lock number 4 at Siddal Bottoms in 2010. The housing was constructed in 2005 after the feasibility study by Sheffield Hallam University concluded that it would be too costly to re-open the canal.
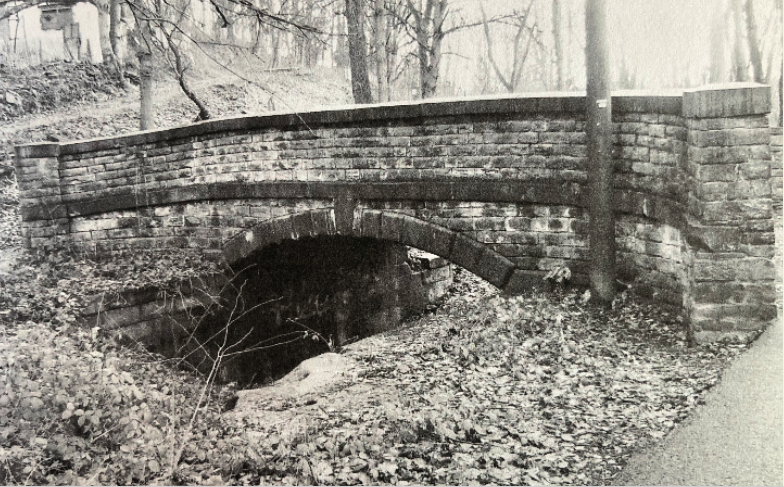
Number 3 bridge and the buried remains of lock number 7, taken in 2011. The bridge is in good condition apart from needing some re-pointing work. The upper structure is not opposed to pieces surface finished by the stonemason. the visible parts of the lock Chamber, the underside of the bridge, the top copings and a string course are all stonemasonry work. There are however, very few masons marks to be seen on this structure.
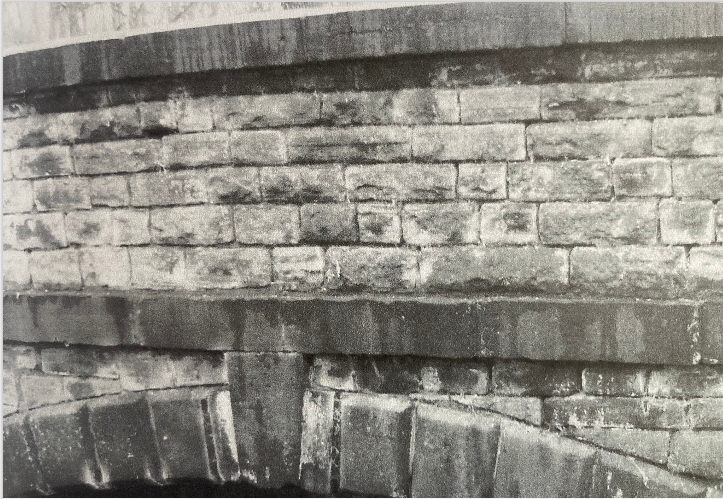
Close details of the above bridge showing the contrasting finish to the stonework
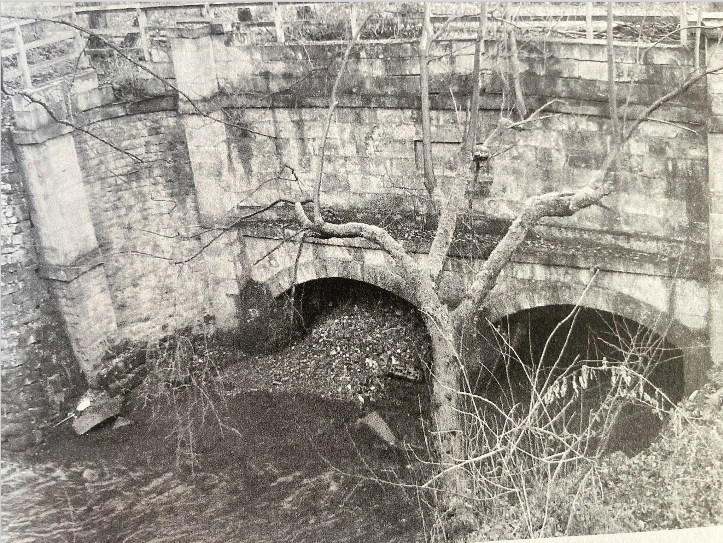
The aquaduct that carried the canal over the Hebble Brook at the bottom of Farrah Mill Lane. This rare and splendid piece of industrial architecture now has some serious, but not irreversible problems to contend with. Apart from the missing coping stones that are probably in the water below, there are trees rooted in and around the structure that will, if left unattended, eventually take the thing apart.
Judging by the physical remains that are still visible, very little demolition of the canal actually seems to have taken place in the last 69 years. It would appear to have been more like the burial of something that had died. The bridges are still in place because by the time of closure most of them formed part of the road network in the Hebble Valley. The lock chambers were so heavily constructed that pulling them down would have been a mammoth task with very little to show for the effort.
After the water had disappeared, which would have happened very quickly without the Siddal pump running, and the lock sluice paddles left open, what was left was a 1 1/4 mile linear hole in the valley that was ready to take rubble and as a result of the war, the decline of the heavy industries and slum clearance, rubble supplies were not a problem. So, the Halifax canal vanished into the ground, to be forgotten to the point that there is now a generation of people in the town, who, like myself at one time, simply don't know that it existed at all.
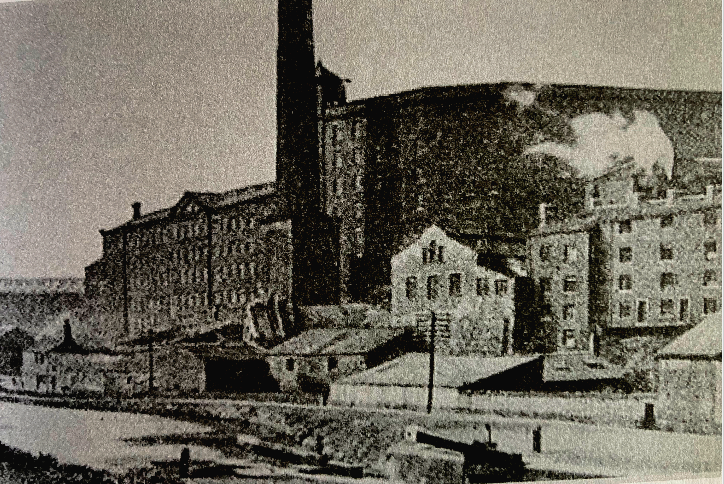
The Shaw Lodge Mills complex above Boys Lane. The picture was taken in 1913 looking across number eleven lock. Although the mill buildings are now protected with a grade two listing, the proposed development is on hold due to the depressed housing market.
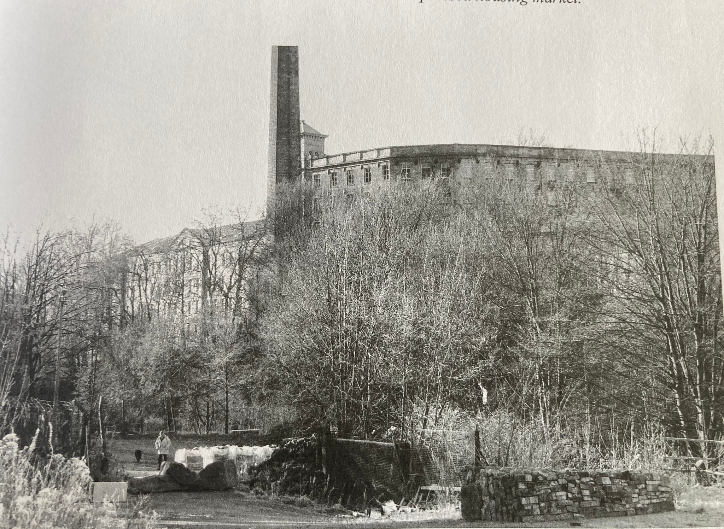
The site of lock number eleven, buried in the foreground of this 2011 picture. This section of canal is being used by a stone reclamation company as a storage area. The old gasometer site is on an elevated area to the left of this view.

Bailey Hall Wharfe. Mackintosh's would build on this site in the 1950s
Written and researched by the late Alan Briggs
Now read The Shaw Lodge Report for more information

If you have enjoyed your visit to this website, please spread the word by clicking the 'like' and 'share' buttons below. Thank you
Are you wanting to find information on a specific Halifax subject? Search here
